


There have been a series of questions on the below topics
- How To Protect My E-commerce Website From Hackers??
- How To Protect My WordPress Website From Hackers??
- How To Protect My PHP Site From Hackers??
- How To Protect My Website From Hackers??
But have gotten the solutions for you in here so chill and read through…
Here are Expertise advice for optimising your website security and also means of avoiding hacking disasters
You may be thinking your site has anything worthful being hacked for because thousands of website are being compromised all the time.
The majority of website security breaches are not just for stealing your data, mess with your website layout, to set up a temporary web server, to serve files of an illegal nature, a means to abuse compromised machines include using your servers as part of a botnet, or to mine for Bitcoins.
Hacking is now a day to day activities performed using scripts written to exploit known vulnerability in software on the internet, Here is our top Eleven Website Security Measures and Checklist to keep your site safe online.
#1. Maintain Softwares Up To Date.
This seems obvious right, but putting to practice to keep all software up to date is a very vital role in keeping your site secure.
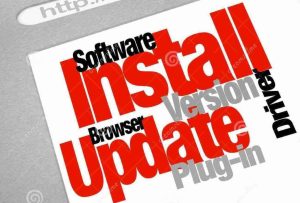 This applies to both the server operating system and any software you may be running on your website such as the CMS, Plugins. Because When website security loopholes are found in software, hackers are quick to attempt to exploit them.
If you are using a hosting solution/plans then you don’t need to worry so much about the security updates for the operating systems because the hosting company would handle that.
If you are using third-party software on your website such as a CMS, Plugins, Themes, you should ensure you are quick to apply any security patches.
Most vendors have a mailing, WordPress, Umbraco and many other CMSs will notify you of any available system updates whenever you log in to your dashboards. You just have to stay awake to make sure you update your software whenever there is an update, for Lazy WordPress Users have gotten you a Guide To Automatically update your CMS and Plugins 😍, isn’t That Okay??
[bctt tweet=” List Of Security Tips To Protect Your Website From Hackers” nofollow=”yes” prompt=”tell a friend”]#2. Be Caution Of Error Messages.
You have to be careful with the amount of information you give away in your error messages. Provide only little errors to your users, to ensure they don’t leak out secrets present on your server (e.g. API keys or database passwords).
 In short ever don’t provide full exception details either, as these can result in complex attacks like SQL injection. So Keep detailed errors in your server logs, and show users only the information they need.
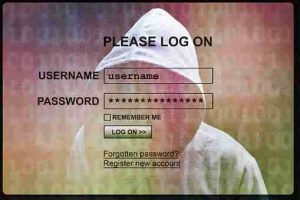
#3. Make Your Access Control Complex.
The admin dashboard of your website is an easy gateway into everything you do not want a hacker to see.
So why can’t Enforce user names and passwords that can not be guessed🤷, Don’t be cheap🙅? Also, change your default database prefix from “wp6_” to something random and harder to guess. Limit the number of login attempts within a certain time to avoid attacks like brute force.
 You can use the WordPress Login LockDown Plugins, the first thing you need to do is install and activate the Login LockDown plugin. Upon activation, you need to visit the Settings » Login LockDown page to configure the plugin settings.
You need to define how many login attempts can be made. After that choose how long a user will be unable to retry if they exceed the failed attempts.
You can also define the lockout period for IP range blocks. The default value is 60 minutes, you can adjust that if you need.
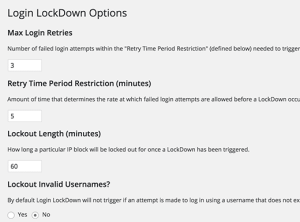 The plugin will allow users to keep trying different invalid usernames. Click on yes under lockout invalid usernames option to stop this.
By default, WordPress lets users know whether they entered an invalid username or invalid password on failed logins. You can hide this by clicking yes under mask login errors option.
Don’t forget to click on the update settings button to store your changes.
Also, limit the amount of time password can be reset because your email accounts can also be hacked as well. Never send login details by email, in case an unauthorized user has gained access to the account.
#4. Make The Admin Pages Invisible.
It isn’t good if your admin page get indexed by search engines, so you should
1. Use The robots.txt file to discourage search engines from listing them. If they are not indexed then they are harder for hackers to find.
2. Now that you’ve secured it from getting indexed, what about the smart Hackers who already knows all WordPress sites use/wp-admin and /wp-login.php as the default login page.
Then let’s give this guy’s a work to do by changing our login URL from /wp-admin or /wp-login.php to any fucking thing we want, I will not want to stress you, so I will want you all to use iThemes Security Plugin to do this.
 iThemes Security is among the most popular plugins in the WordPress Plugin Directory.
This plugin does a lot more than just create a custom login URL. You can use iThemes Security to perform a wide range of hardening WordPress website security. I won’t get into all that iThemes Security does, but among its features is the ability to create a custom login URL and to redirect wp-login.php to a 404 page or any other page you like.
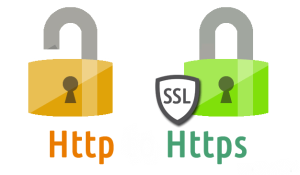
#5. Make Use Of SSL/HTTPS Protocol.
HTTPS is a protocol used to provide security over the Internet. HTTPS guarantees that users are talking to the server they expect and that nobody else can intercept or change the content they’re seeing in transit.
If you have anything that your users might want private, it’s highly advisable to use only HTTPS to deliver it. That, of course, means credit card and login pages (and the URLs they submit to,
 Even a login form will often set a cookie for example, which is sent with every other request to your site that a logged-in user makes, and is used to authenticate those requests. An attacker can steal this and will be able to imitate a user and take over their login session.
To defeat this kind of attacks, you must always use the HTTPS for your entire site, Using HTTPs is no longer as tricky or expensive as it was before, they are now free.
Let’s Encrypt provides free and automated certificates, which you’ll need to enable HTTPS, and there are existing community tools available for a wide range of common platforms and frameworks to automatically set this up for you.
HTTPs Protocol is not only protecting your site from hackers attacks like MIMT, but it will also help your Website SEO because Google said HTTPs Site will rank better than HTTP sites
So if you are already using HTTPS, Then let’s go further and look at setting up HSTS [HTTP Strict Transport Security], an easy header you can add to your server responses to disallow insecure HTTP for your entire domain.
#6. Protect Against XSS Attacks.
XSS attacks inject malicious JavaScript into your pages, which then runs in the browsers of your users, and can change page content, redirect URLs, or steal information to send back to the attacker.
This is a particular concern in modern web applications, where pages are now built primarily from user content, and which in many cases generate HTML that’s then also interpreted by front-end frameworks like Angular and Ember.
These frameworks provide many XSS protections, but mixing server and client rendering creates new and more complicated attack avenues too: not only is injecting JavaScript into the HTML effective, but you can also inject content that will run code by inserting Angular directives or using Ember helpers
To prevent XSS the Toolbox is your Content Security Policy (CSP). CSP is a header your server can return which tells the browser to limit how and what JavaScript is executed in the page,
For example to disallow running of any scripts not hosted on your domain, disallow inline JavaScript, or disable eval().
Mozilla has a pretty guide with some example configurations. This makes it harder for an attacker’s scripts to work, even if they can get them into your page… HAPPY??
#7. Install Web Application Firewall.
A web application firewall (WAF) can be software or hardware-based. It sets between your website server and the data connection and reads every bit of data passing through it.
 There are so many cloud-based and provided as a plug-and-play service, we Cloudflare, Sucuri, And so many Web App firewalls, All this Firewalls are basically, the cloud service which is deployed in front of your server, where it serves as a gateway for all incoming traffic.
Once installed, the web application firewall provides complete peace of mind, by blocking all hacking attempts and also filtering out other types of unwanted traffic, like spammers and malicious bots.
#8. Get Security Plugin Into Your Server.
While not as effective as a full-blown WAF, there are some free and paid for security plugin that you can install that will make life a bit more difficult for hackers.
Even some free WordPress security plugins such as the one’s from Acunetix WP Security, Wordfence Security can provide an additional level of protection by hiding the identity of your website’s CMS.
By doing so this tool makes you more resilient against automated hacking tools that scout the web, looking for WordPress sites with specific build and version, which has one or more known vulnerabilities.
#9. Avoid File Upload.
File uploads are a major concern. No matter how thoroughly the system checks them out, bugs can still get through and allow a hacker unlimited access to your site’s data.
The best solution is to prevent direct access to any uploaded files. Store them outside the root directory and use a script to access them when necessary. Your web host will probably help you to set this up.
But if probably you are asked to pay or got no answers, here is also a means of solving it, The options are to rename the file on upload to ensure the correct file extension, or to change the file permissions, for example, chmod 0666 so it can’t be executed. If using *nix, you could create a .htaccess file (see below) that will only allow access to set files preventing the double extension attack.
deny from all <Files ~ “^\w+\.(gif|jpe?g|png)$”> order deny,allow allow from all </Files>
Ultimately, the recommended solution is to prevent direct access to uploaded files all together. This way, any files uploaded to your website are stored in a folder outside of the webroot or in the database as a blob.
If your files are not directly accessible you will need to create a script to fetch the files from the private folder (or an HTTP handler in .NET) and deliver them to the browser.
Image tags support an src attribute that is not a direct URL to an image, so your src attribute can point to your file delivery script providing you set the correct content type in the HTTP header. For example:
<img src=”/imageDelivery.php?id=1234″ /> <?php // imageDelivery.php // Fetch image filename from database based on $_GET[“id”] … // Deliver image to browser Header(‘Content-Type: image/gif’); readfile(‘images/’.$fileName); ?>
Most hosting providers deal with the server configuration for you, but if you are hosting your website on your own server then there are few things you will want to check.
Ensure you have a firewall set up and are blocking all non-essential ports. If possible setting up a DMZ (Demilitarized Zone) only allowing access to port 80 and 443 from the outside world.
Although this might not be possible if you don’t have access to your server from an internal network as you would need to open up ports to allow uploading files and to remotely log in to your server over SSH or RDP.
#10. Backup Frequently.
Just in case the worst happens anyway, which I will never pray for that to happen to anyone, always keep everything backed-up. Back up on-site, back up off-site, back up a day. No one can predict, remember nothing on the internet is 100% safe.
So If you are using WordPress CMS, then I will urge you to use UdraftpLus Backup Plugin, it’s free and fast, it can help you back up your site database, or backup your post and themes, plugin within some seconds into your Google Drive, Dropbox and even in the UdraftpLus Cloud and restoring your backed-up data is one click.
#11. Get Website Security Tools.
Getting website security tools is far different from Installing web application firewalls or Installing Security Plugins,
 Security Tools are what you will use in testing your website whenever you think you have done all you can on your blog.
So How do you know if a site is secure?
Then it’s time to test your website security. The most effective way of doing this is via the use of some website security tools, often referred to as penetration testing or pen testing tools for short.
There are many commercial and free or Open-Source products to assist you with this. They work on a similar basis to scripts hackers in that they test all know exploits and attempt to compromise your site using some of the previous mentioned methods such as SQL Injection.
Here are Some free tools that are worth looking at:
Netsparker (Free community edition and trial version available). Good for testing SQL injection and XSS
OpenVAS Claims to be the most advanced open source security scanner. Good for testing known vulnerabilities, currently scans over 25,000.
But it can be difficult to set up and requires an OpenVAS server to be installed which only runs on *nix. OpenVAS is a fork of a Nessus before it became a closed-source commercial product.
SecurityHeaders.io (free online check). This tool is a quick report which security headers mentioned above (such as CSP and HSTS) a domain has enabled and correctly configured.
Xsser A tool from Kali Tools that includes a huge selection of XSS attack examples, which you can run to quickly confirm whether your site’s inputs are vulnerable in Chrome, Firefox and IE.
The results from automated tests can be daunting, as they present a wealth of potential issues. The important thing is to focus on the critical issues first.
Each issue reported normally comes with a good explanation of the potential vulnerability. You will probably find that some of the medium/low issues aren’t a concern for your site.
There are some further steps you can take to manually try to compromise your site by altering POST/GET values.
A debugging proxy can assist you here as it allows you to intercept the values of an HTTP request between your browser and the server.
12. Let A Pentester Help You Configure/Perform a Security Check-up.
We are done with all the Obscurity in Security, Now let’s Get a Penetration Tester to help us configure and test both internal and external security of our web application.
I know right now you’re already thinking, huh, that will cost me🤦. My website isn’t that kind of a big brand so I don’t need a Penetration tester🤷, I believe I have set up all my website security, Damm doesn’t think like that.
 Even Facebook and other Big sites and Small sites who you believe have strong security even hires Penetration Testers to do what they do.


